Android Continuous Integration
The following instructions are provided to help you quickly to set up an Android Continuous Integration system using Jenkins and Perforce – however you could just as easily swap out Perforce and use SVN and GIT. The configuration below is provided to have Jenkins build an APK of your app, load the APK to a USB Android Device and run the ‘Monkey’ exerciser to test.
Assuming the Android SDK/NDK, Perforce Client software and Perforce Depot already exist. The OS used for this setup was Ubuntu.
Install Jenkins:
wget -q -O - http://pkg.jenkins-ci.org/debian/jenkins-ci.org.key | apt-key add -
sudo echo deb http://pkg.jenkins-ci.org/debian binary/ >> /etc/apt/sources.list.d/jenkins.list
sudo apt-get update
sudo apt-get install jenkins
Test jenkins is installed by opening browser and visit URL http://localhost:8080/
To adjust jenkins config such as HTTP_PORT:
sudo gedit /etc/default/jenkins
Restart jenkins with new config:
sudo service jenkins restart
OR
http://localhost:8080/restart
Jenkins install will be located at:
/var/lib/jenkins
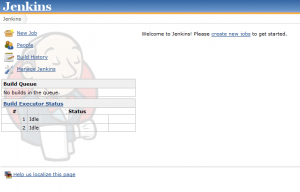
You should now be able to see the Jenkins dashboard in your browser at http://localhost:8080/
From jenkins Dashboard click on ‘Manage Jenkins’ -> ‘Manage Plugins’ and install ‘Perforce Plugin’, ‘Android Emulator Plugin’ and ‘Thin Backup’ plugin.
Return to jenkins Dashboard and click on ‘Manage Jenkins’ -> ‘Configure System’ and set a Jenkins URL:
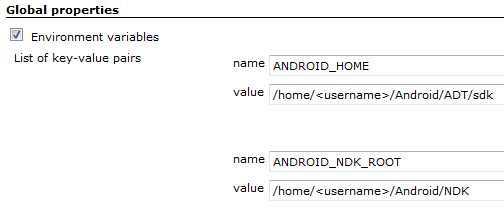
Continuing the configuration settings in ‘Manage Jenkins’ -> ‘Configure System’ add the Android Environment variables under the Jenkins ‘Global Properties’ (alternatively you could use Emulator Plugin fields under ‘Manage Jenkins’ -> ‘Manage Jenkins’ -> ‘Android’ -> ‘Android SDK Root’)
Because jenkins is installed as a service the system also runs using a ‘jenkins’ user type so you will also need to give ‘jenkins’ user access to your Android enviroment. Use the following to give jenkins user the appropriate rights:
setfacl -Rm u:jenkins:rwx /home/<username>/Android
At this point it is also probably a good time to set up the jenkins Email Notification settings – see ‘Manage Jenkins’ -> ‘Configure System’ -> ‘E-mail Notification’.
It is now time to set up the jenkins Job that will perform the actual task of polling Perforce for new ChangeLists, Syncronising the workspace, performing the Builds and deploying the resulting APK to a USB device.
From jenkins Dashboard click on New Job and select ‘Build a free-style software project’. Give your New Job a name and click ‘OK’.
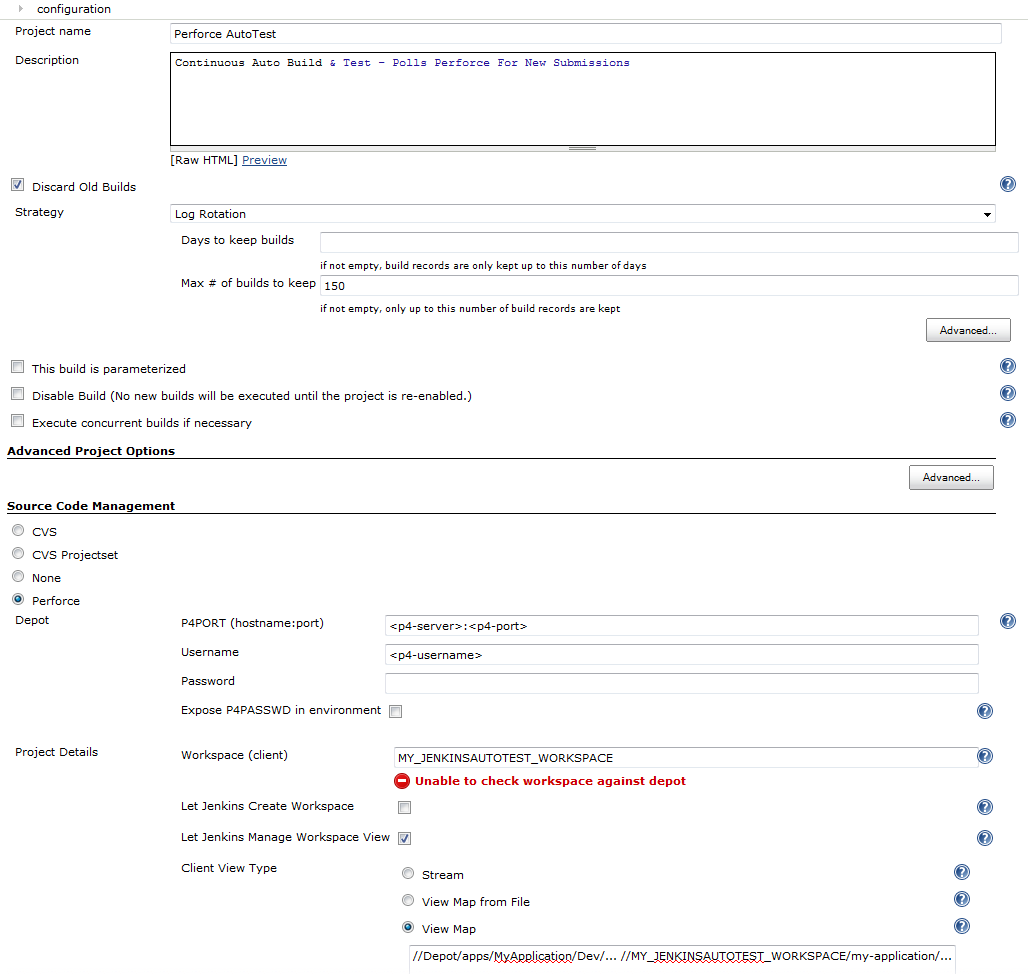
You will now be presented with a configuration form. The form is shown here split into parts for you to follow.
First configure the Perforce settings – we assume you have already set up a Workspace in your Perforce Client and that Client connects to a Perforce Depot. You will need the IP Address and Port of your Perforce Server, your Perforce Username and Password and the name of your Workspace. The configuration also needs the Workspace mappings used.
Next configure how often jenkins polls Perforce repository for new Change Lists to synchronise and build. Here we have set every 30 minutes using Cron notation.
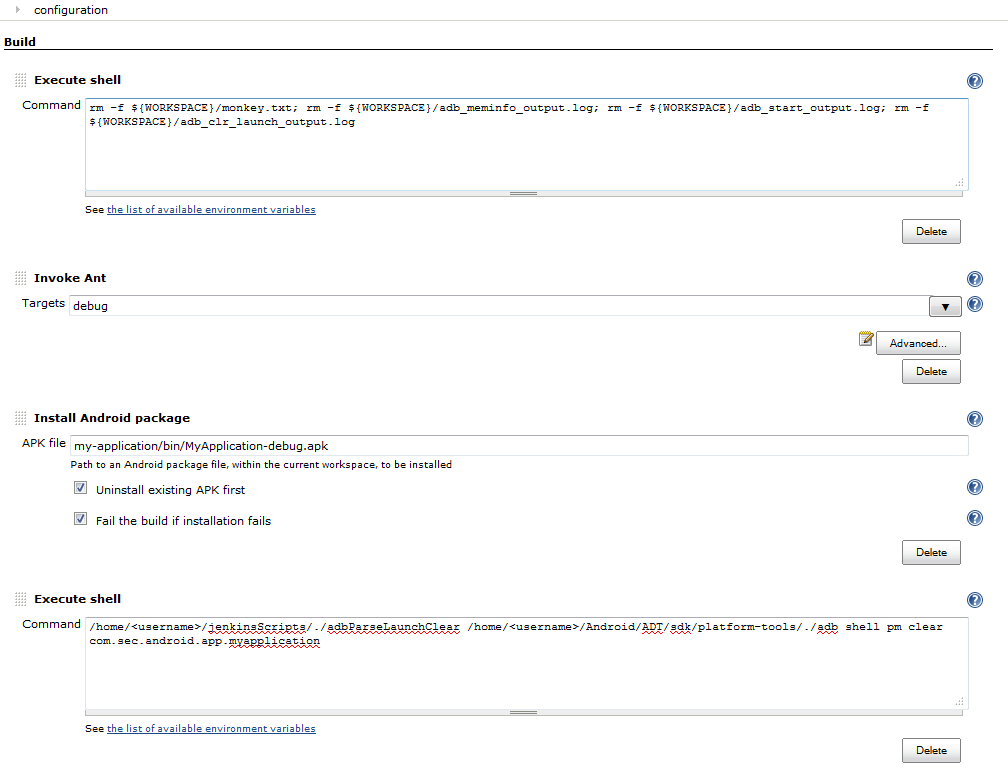
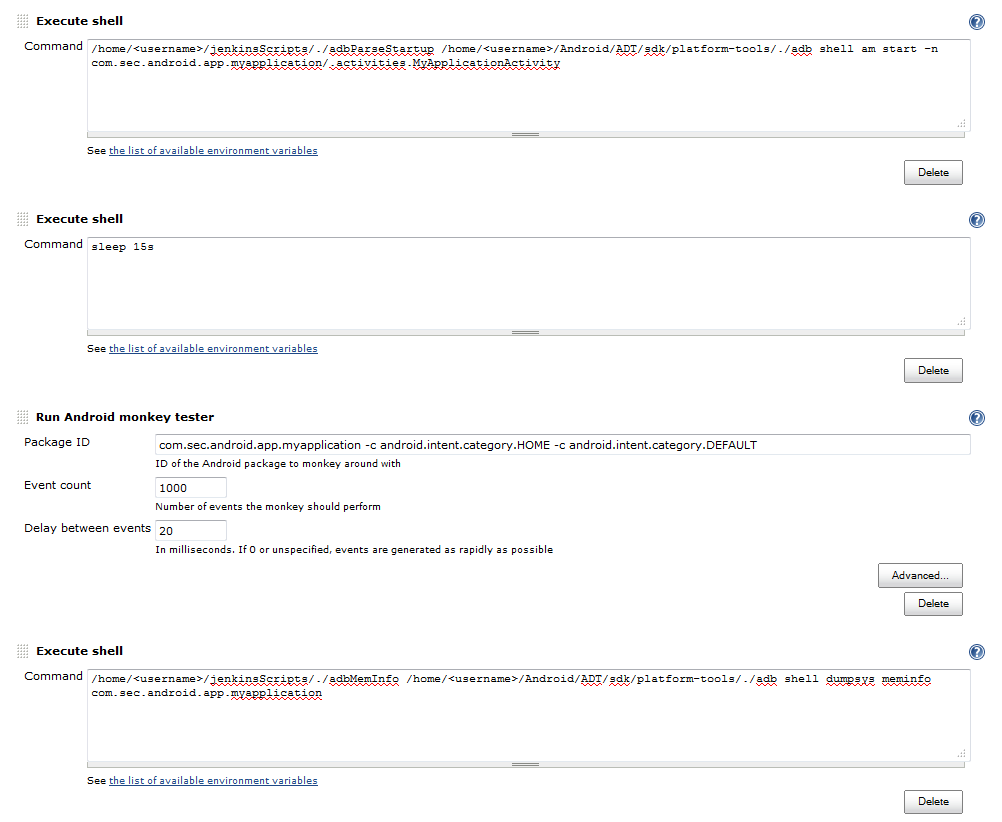
Next add the Build Steps shown below. The first ‘Execute Shell’ clears out the temporary files created during a build. This should be followed by an ‘Invoke Ant’ step to build the source code in the jenkins Workspace. Next step will be the ‘Install Android package’ to load the resulting APK file to an attached USB device. Following the Install there is an ‘Execute Shell’ that runs the adb shell command to clear the memory used by your application:
The next ‘Execute Shell’ you will specify is an adb shell command to start your application on the attached device. This is followed by another ‘Execute Shell’ that runs ‘sleep’ to allow the application to start – you can specify how many seconds to sleep. Use the Run Android monkey tester field to specify the application you are testing, the number of events for Monkey to randomly send to the device and the delay in milliseconds between these events. We have also used a final ‘Execute Shell’ to specify an adb shell command to dump the memory usage from the device.
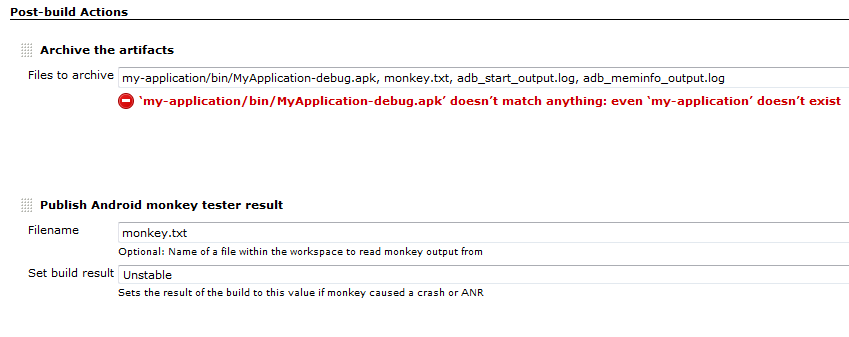
The last part of the job configuration are the ‘Post-build’ actions. Here we have the ‘Archive the artifacts’ step that saves archive of the APK tested, the Monkey test results and the temporary file created from the adb shell start and dumpsys commands.
At this point you can ‘Save’ off your configuration and test your job by clicking ‘Build Now’

